Saturday, August 10, 2013

Bon Appetit

It's truly been a scrappy weekend and I am super pleased with all my layouts. These gorgeous papers are from graphic 45's French Country collection. The papers are so decadent that really,  it was all the layout needed. The food was just some of the lovely dishes I had in Ireland.

Products used:
1) Graphic 45 French Country papers
2) Grunge twine
3) Crafty Secrets What's Cooking? stickers 

Granny's Kitchen

We found this adorable shop near the rock of Cashel in County Tipperary in Ireland. Unfortunately,  it was closed but we found awesome cake at another little shop nearby. Lovely day all around.
Products used:
  1. Prima Divine thickers
  2. Spellbinders foliage die
  3. Marianne Designs metal bench die
  4. Cheery Lynn small doily die
  5. Prima flowers
  6. Polka dot washi tape
  7. Prima journaling card 

Friday, August 9, 2013

The Secret Garden

Though not a secret nor really a garden, the grounds of Bunratty castle was dotted with museum cottages that preserve the simplicity of life in rural Ireland. There were also real ponies to  be seen.
I'm terribly late I am afraid. Still scrapping the pictures of my Europe adventure that now seems a world away. I realised my memory was failing too. I couldn't even remember the name of the castle!  It would be sad indeed to forget; hence why scrapbooking is honestly more important than most give it credit for.
I've finally gotten over my reluctance to use my pretty paper stash. What's the point in keeping and not using eh?
So now it's no holds barred.  The best of my stash for the here and now.
Products used:
  1. Prima Fairy Rhymes papers
  2. MFT medium swirl die
  3. Marianne Design small flowers die
  4. Graphic 45 Secret Garden paper
  5. Holly Hobbie stamps (FOC frm Cardmaking and Papercraft magazine)
  6. Kaisercraft butterfly stamp
  7. Distress inks
  8. Derwent watercolour pencils 

Sunday, July 14, 2013

Watercolour wonder

I just invested in a set of 24 Derwent watercolour pencils. Now these are the absolute best. Artist quality. I was worried I wouldn't be able to do these lovely pencils justice.

I'll let you decide if I've done a good enough job.

The stamps are Micia - a Taiwanese brand that have become popular here. I was pleasantly surprised by the quality. Unlike the made in China equivalents,  these stamps were deeply etched and of thick quality clear rubber. They feel a lot like their made in the USA counterparts. For RM49.90, it's pretty much value for money (because clear stamps are just too expensive here as is most everything hobby related).

Enough of my rambling! On to thd card.

Distressed & bejewelled

A quick card using Distress inks to blend a two-tone background. All stamps are from a Prima cling stamp set - the set doesn't have a name but the number is #557126 if you're interested to source it. It's not new- maybe early this year so you've been warned it may be harder to find! 

I loved the blue & green mix which looks quite decadent.  The swirl die is from cheery lynn and is my favorite die hands down (can u tell?  It's on almost every project).

And of course,  some awesome washi tape with lots of birdcages!

Saturday, July 6, 2013

Craft shopping at the supplies surprise bazaar #10

Today, after a sobering trip to the doctor, I headed to a craft bazaar in Sunway. I have never been to one and was excited at the goodies I may find. Also, I expected hefty bargains because the bazaar featured fellow crafters selling as individuals and not large retail stores. Such sellers had fewer overheads and thus, passed the savings on to the buyer.
Firstly,  I must point out how impressed I was by the turnout. The bazaar was tiny with very few sellers but even at opening, the room was already filling out with customers.  It was heartwarming for a crafter to see how the hobby has taken off.
As a proper review, let me give you a rundown on different areas. 

Variety of stalls
Mind you,  the space available was very small. Approximately 15 stalls selling sewing craft items, miscellaneous bits n bobs, charms and jewellery findings and one large stall for papercrafting items.
There's no surprise in where I was first!
Washi tape was definitely a hit with 3 out of the 15 selling quite a variety. Prices varied greatly but the fun part was that the assortment rarely overlapped. Washi is made in such an abundance of designs that it was perfectly possible for variants to rarely overlap!
Many sold rubber stamps, stickers and postcards but were mainly cheaper China made stock and were not acid free.

Prices
Here's where I found myself disappointed.  I cannot pass much judgement on the sewing or jewellery making items because it isn't my forte but I can attest for the prices of the papercrafting products. Memory box, spellbinders and dienamics dies were being sold at quite frankly, rather high prices much akin to that shall not be named craft store in Tropicana that I avoid.
I found this disappointing. The selection available was good and vast but rm80 for one patterned die seemed quite ludicrous. I only bought one and quickly came home and checked Joanna Sheen's online store. Although the die I bought was not available, similar sized dies sold for 10 quid - rm50. Joanna Sheen was already making store profit,  this lady was adding another rm30 to that profit (I'm assuming she is getting her stock from a supplier and not buying off a store herself and selling secondary market).
She also sold 12x12 paper packs divided in 2 for rm60. So if you want a full set it's rm120. Spellbinders dies at rm130-rm145. Magnolia stamps at rm69.90 each. Again, all the same price as Tropicana.
Papier sells spellbinders dies at rm120 plus you get a 10% member discount. Shocking!
Sad. She had a lovely variety of dies but much too expensive for a private seller. Tropicana store has rental and salaries to pay so you can justify such prices. Sorry sweetie, an avid crafter just gave you a thumbs down.  Booo! 

Washi tape sellers were a little more generous with their discounts. Rolls were sold at rm9 ar Hearts & Craft's stall and rm25 for 3 at Maeday's (regular stores sell these 3 for rm40 or 1 for rm16 so it was quite the bargain). There was another stall but I only bought the large washi from her at rm15 (regular stores sell these for rm20-29).

Location
As a Subang-ite, the place was easy enough to find for me but I can see how an unfamiliar could get lost. You would also have to heavily rely on advertising prior because the 3rd floor shop is unlikely to be found by passersby so walk-ins will be few if any.

The shop was small but cosy. Sellers were warm and friendly.  I love that abt crafters. Everyone treats each other as friends immediately. It's the hobby that brings you together.
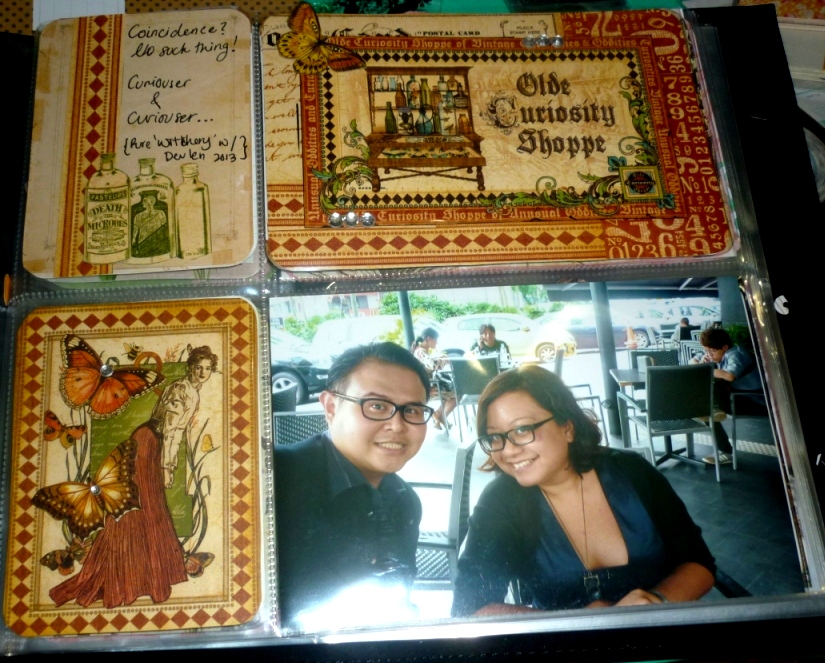
I only took a few pictures but here's some eyecandy of the stalls.


And of course, my haul for the day. RM250+ spent on washi tape, patterned paper, 1 die, postcard pack, key charms and stickers. 
 

Tuesday, June 18, 2013

Rejoice! An 'uplifting' altered notebook

For my dt project this mth, I personalised a regular notebook. An extremely simple project with clean lines and lots of open spaces. Yet, I think it's pretty in it's own simplistic way. 

I can't wait to get it back from rotation so it can serve as the memory keeper and story teller that it was meant to be.

Sunday, June 16, 2013

Mixed media job

After Papier resident artist Amelia gave a live demo on how to do this, I decided to give it a shot. I used an 8x8 canvas as opposed to 12x12 just so I didn't intimidate myself.

Only 2 cans of real spray mist. The third I made using Martha Stewart paints; cheap eyeshadow and a spray bottle from daiso. It turned out remarkably well.

The findings are a mash of whatever was available in my drawer. It was hard finding enough; I kid you not. I suggest if you'd like to try this - do raid your local hardware store first.
I don't think I need to tell you who's in the picture. ;-)

Monday, May 27, 2013

DT post for the Week: Colour Blocking on cards!

My DT post for the week on Papier!

Colour blocking - extremely simple and effective cardmaking.
......
If cardmaking magazines are anything to go by; colour blocking seems to be what's 'in'. It's interesting to see what different looks you can achieve with this simple technique. Just a bunch of squares cut with square nestabilities dies and assembled in different colour coding onto your card base.


One card features bright, modern, solid patterns whilst the other sports a vintage, shabby chic look. The vintage images inside the boxes are from a gorgeous set of square images on a Prima 12x12 cardstock from the 'Divine' collection.


Both are extremely simple to make and take less than a half hour to conceptualise.

Products used:
  • Prima Divine 'Chanson' paper 12x12
  • Webster's Pages 'Everlasting Love' paper 12x12
  • Webster's Pages Alison Kreft 'That Way' paper 12x12
  • Bo Bunny Jewels
  • Bo Bunny cardstock stickers 'True Friend'
  • Damask Ribbon*
  • Brown Ribbon*
  • Lace Ribbon*
  • Faux flowers*
Save for items marked *, all materials available at Papier whilst stock lasts.

Sunday, March 10, 2013

Project Life continues

I am probably one of the worst PL scrappers ever.

And I mean ever.

I don't do monthly, nor weekly- just occasion based. And even then, I think I've gotten up to 6 pages for 2013. I guess I don't want to take pics of just anything. I want my PL to be extra special. Recording only those events that are, well, just that. Extra Special.

So I did a few more: Kamini's birthday, Ameena's akad nikah (Malay wedding ceremony) and my strange though enlightening meeting with Devlen.

Kamini's 28th Birthday
With Ameena's son, Rifqi
Ameena's akad
with Devlen
I find I rely less and less on the core kit journaling cards. I find them, frankly rather boring and unimaginative. I prefer cutting down patterned paper to the required size. Its a good trick though. Now I know that for future PL use, just buy the binder! The other stuff's pretty useless. I guess it works more for beginner crafters or people who just haven't the patience to cut and embellish.

Sunday, February 10, 2013

A Happy CNY!

My offering as DT this week are these CNY cards made out of very un-CNY patterned paper!

I love the oriental stamps from Graphic 45 that just ties them all up in the theme pretty well. The full post is up on the Papier Love Blog here if you'd like to take a gander!


I have been quite busy as far as crafting goes this month as I've received a very challenging project= my first ever mini album from scratch! It was daunting- all those blank chipboard pages and nothing but my imagination to work with! *gasp*

I kinda went to town with it. I am super happy with how it's coming along now but it's not done! Just a sneak peek...


Tuesday, January 22, 2013

Layout: You Check Out!

My last effort with the January DT kit, this page features another simple layout (I find I prefer the simpler layouts as at some point, my brain absolutely refuses to add anymore embellishments!). Anyways, the picture is of Alvin and me in the ferry that took us to Pulau Ketam. Its amazing how much I can scrap pics of Alvin: as if memories with him are the only ones worth scrapping (I know that's awful but I can't help it! We photograph so well together! hehe).


The Checklist, cut out fishies and the sudden turquoise splash of colour came from cardstock. I love the grungy twine and lace ribbon (which I deffo need to go buy more of!).


Like the seashell charms? RM4 a bag from your local haberdashery! :-D

Full post here.

Happy crafting, scrappers!

Sunday, January 13, 2013

Layout: Tea for Two

I am so slow, I am still scrapbooking my Eurotrip 2012. I swear, I feel like I'll never finish but at the same time, it's such a nice memory I love re-living it over and over again.

This is a layout featuring the scrumptious tea serving at the Balmoral Hotel, Edinburgh: the most luxurious high tea in the city. And yet, I feel I've had better desserts here. But nonetheless, another place I can say: been there, done that! :-)

For this layout I used a My Mind's Eye cardstock from the Life Stories collection as well as these other bits and bobs:
- Cardstock from Graphic 45's Kraft Reflections stack
- liquid pearls
- Prima Tea thyme journaling card
- washi tape
- distress stickles in spun sugar
- regular stationary glitter glue
- lace and ribbon
- K and Company chipboard swirls
- labels die by Spellbinders
- EK Success floral border punch


Project Life Begins

Project Life is a huge thing in the US these days and is starting to take the crafting world by storm everywhere else. Conceptualised by Becky Higgins, it's a revolutionary way to scrapbook whether you are pressed for time or creativity. It allows you to scrap as quickly or as meticulously as you like using photos and journaling as the core focus. Check out the video before if you haven't already heard of PL.


Joining as Papier DT meant I had to partake of the Crop sessions and this month it was all about Project Life. At first, I was a little skeptical about the whole thing. It seemed like 'cheating' at scrapbooking but as a cardmaker, I soon found the sizing quite conducive to the styles I am accustomed to. I bought a mini album and card set usually meant for kids. I did wonder if the card set would be enough but I soon found I wasn't relying much on their designs at all and I was making most of it up as I went along. I completed one page during the crop and was so addicted, I came home and scrapped another 3 pages!

It was nice that the binder was small and hence less intimidating. Check out my layouts, done with photos from Alvin and my outing to Pulau Ketam on our yearly seafood 'pilgrimage' on Friday, 11 Jan 2013.

The album cover
page 1 done at Crop session. The black marks aren't actually on the layout. They're from photo-editing to protect my journal entry privacy. ;-)
Page 1 was very challenging! I also had no idea what to bring to the crop session so everything you see was purchased in store on that day. It was a lot of fun to challenge myself to conceptualise a layout and find the stuff I needed at that moment within the time allotted. It opened me to new scrapbooking elements like cardstock stickers and doily stamps. Two things I've previously always shied away from.


Page 2 focused more on the pictures: the Love graffiti and Alvin's pensive profile!

Page 3 is actually my least favourite. I don't work well with images of myself as I do with those I love (especially Alvin).
I felt page 4 turned out the best of all simply because the colour scheme was well planned and of course it featured a gorgeous photo of the two of us.

Til next time, Adios, crafters!


Saturday, January 12, 2013

Kindle Cover - Upcycled Novel

Just an ordinary book? ;-)
A few disclaimers before I begin this one: I cannot take credit for this idea: it's been done to death on Etsy and Youtube. But I did make some changes to suit the materials I had on hand! Second, yes, I get this isn't exactly papercrafting, but I reckoned you guys may be interested in a new craft project!

Now why in the world? 

Yes! My lovely BFF got me a kindle as a birthday gift but I found the cover options available here too plain to be anything Diana Chai would be seen with. Ordering a cute cover online will take about 2-3 weeks so what's a girl to do til then? Well, turn to YouTube

You'll find a myriad of ideas on Kindle covers so I thought, why not? A simple cover to tide me over til I can afford a fancy-pants one. 

What will you need?

Well, a Kindle of course! (hehe...)
- a hardcover book about the size of your Kindle.
- scrap fabric in your chosen colour/design
- foam (any kind! I used packing material foam that came in my Project Life binder!)
- strong adhesive
- elastic cords
- sewing kit
- optional: embellishments and washi tape

How to?

1. Cut out the pages neatly from the hardcover. This is usually quite simple when you've got one that's been sewn instead of glued to the cover.

2) Cut the foam into two identical pieces to fit at the front and the back cover. Here's where I messed up: make sure the foam is thin enough to enable your book to close once your Kindle is in it. Do test it before gluing everything down! Then cover both pieces with fabric. You can glue the back or tape it. It doesn't matter as long as it's secure. I tried to be clever and used decoupage gel (like Modge Podge) to adhere it and it was just messy and pointless. 

3) Sew the elastic at the four corners of one square. This is to hold your Kindle in place. Do test the size as you don't want your device too snug. 

4) Glue both pieces of fabric covered foam down onto the front and back cover.

5) Optional: I used washi tape on the spine both inside and out because I had somewhat mucked it up when I was cutting out the pages. I also made an elastic hold-all band with a felt flower. This was more to hold the book shut as I had, as mentioned before, used foam that was too thick.

Its great if you get it right. You won't have to buy an expensive cover only to find everyone else having the same. For me, it's merely temporary since I've not quite got it right. Good Luck!

The colours are gaudy but it's the only fabric I had on hand! :-S
all snugly
A Kindle Sandwich
     
The cute flower hides my ugly stitching on the elastic


Sunday, January 6, 2013

First DT Posting: CAS Layout

Hi everyone and a happy 2013 to you!

I have just posted my first project on the Papier Love Blog as DT!

With the January DT kit, I made a clean and simple layout using a picture of my cousin Mel and his son William. The picture was just so full of happiness and life it went perfectly with the colours in the papers. It was definitely a quick project and extremely simple to do!

Check out the full post here!


P.S. I've also got a mini Project Life binder and matching journalling cards! As soon as I can get some pictures printed, I will be embarking on my little PL journey! Stay tuned! (Psst! Yes, I will have to update a lot more often now! Oh the perils of being creative! hehe)